The camera review this week was a donation from Mike Williams in Hickory, North Carolina. Mike found the 7s at a local yard sale for $5.00 (US) and shipped it out west. Make sure to check our Mike’s current project on Youtube, 12 Months/12 Cameras, where he shoots an entire month with a single camera and shares a video review.
The Petri 7s was manufactured by the Petri Camera Company from 1963 – 1976. Features: coupled rangefinder focus, around-the-lens selenium light meter, shutter speeds from 1 to 1/500 sec, and a 45mm f/2.8 – 16 lens. The Petri company called their rangefinder focus system the Green-O-Matic because the overall viewfinder is tinted green while the focusing area is yellow. The idea was that contrasting colors made it easier to focus.
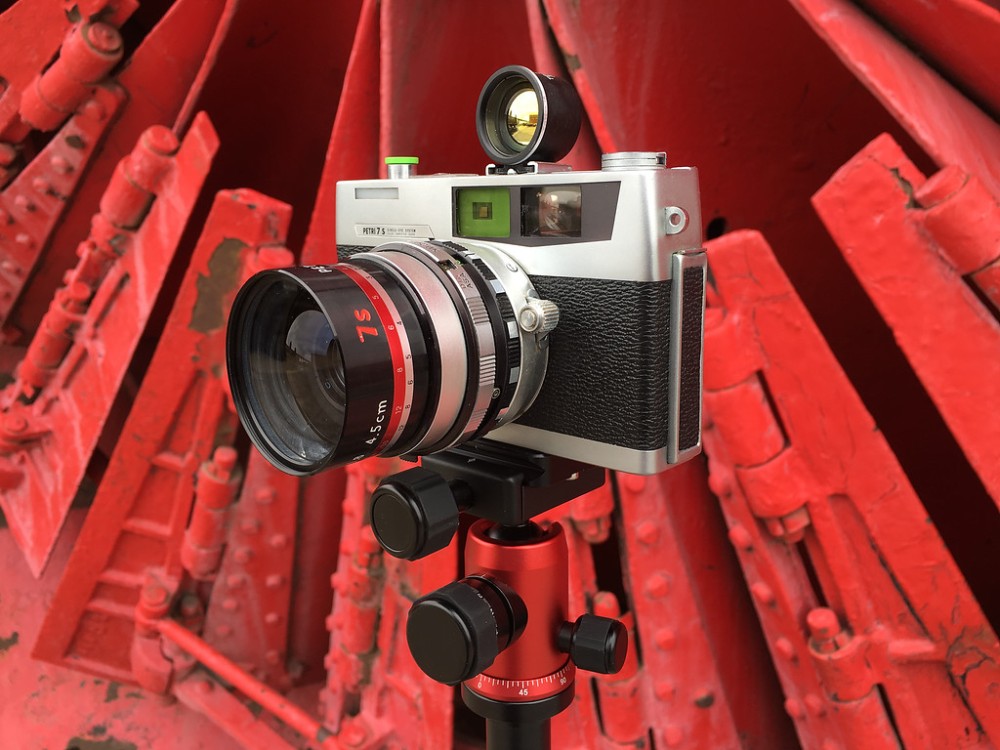
After the Petri 7S arrived, I purchased a telephoto and wide angle diopter set from a user in a vintage camera group on Facebook for $12. The diopters are screwed in to the 52mm thread mount, and the viewfinder is attached to the camera cold/accessory shoe. My results with the diopter set are mixed. This is the first time I’ve used diopters with a rangefinder camera. In the digital world, my experience with adding more glass in front or behind a lens results in difficult focusing and poor image quality.
The selenium light meter on the Petri 7s circles the lens. This design was initially created to allow the meter to read the light behind an attached lens filter. The camera has two match-needle meters. One is visible in the viewfinder, and the other on the top of the camera body. In this particular 7s, the needles on both do not display the same reading. In some of my images, I tried to split the difference between the two with little success. I had much better results metering with my Gossen Luna Pro S handheld meter.


You can find the Petri 7s for as cheap as $8.00 (US) on eBay, and there are a lot of them. While I really enjoy a good rangefinder camera, this one ranks towards the bottom of the list. And not because of the meter issue. That’s almost expected with a selenium meter on a camera that’s a) this old and b) you don’t know how it was stored. My test images were shot on Film Photography Project’s Edu 200 BW Film. There was some scratching on the negatives in most of the images that I intend to investigate. If I had to pick a rangefinder from 60’s or 70’s, I’d consider a Yashica or Minolta over the Petri. However, for less than twenty bucks, it was worth the gamble. Do you have a any of the Petri rangefinders? I’d love to hear your thoughts in the comment section below.

Hi Shaun! Nice write-up but I’m a bit confused with 2 points. 1–As I understand it a diopter is a lens on the viewfinder of a camera that one calibrates for accurate focusing to ones eye. A cheaper camera like a Petri does not have a diopter. What you have here, again, as I understand the terminology, is an auxiliary lens; a lens that is added to another in order to change its magnification. 2–Were all the images shown here taken with the auxiliary lens in place? They are very badly clouded and this is not how a normal Petri lens should look. A good, clean, working Petri 7s should take perfectly acceptable images without all the fogging. Images of the quality of yours seem likely the result of aperture lubrication migrating onto the optics which I have not seen with a Petri but is common with earlier Leica lenses. I wonder if the issue is with the fixed lens or the aux lens. Since there wasn’t any mention of potential functional issues with the optics here, I just wanted to point it out as not valid examples of this camera/lenses performance.
Less a point of confusion and just a comment, I have used a number of cameras that feature two meter read-out’s, one in the viewfinder and one on the top plate. They can often get out of sync but this is usually a simple adjustment covered by a standard CLA. I am not sure how the Petri is built but if it’s anything like a Yashica Lynx, the more reliable meter will be the one in the viewfinder as this one is directly coupled to the meter whereas the top plate read-out is coupled to the viewfinder meter via a linkage.
In short, I’m guessing that a little servicing might find you with much more pleasing results. In my opinion, the Petri 7s is one of those cheapie cameras that is very functional and usable with some TLC. Just like Yashica and Minolta fixed lens rangefinders.
Thanks for your article.
LikeLike
About half of my images from this roll I was using the tele or wide attachment. The shot of the ice cream on the counter was without. So, the camera does have the ability to capture some okay images. I also worry about the selenium meter’s ability to meter light thru a lens attachment like the tele or wide.
Thanks for the clarification on the diopter terminology and clarification.
And thank you for your opinion and knowledge on the subject. To me, part of the fun in shooting vintage gear is learning things like you’ve shared.
LikeLike
I have never used any aux lenses previously out of fear of the reduced optical performance. But I imagine that your concern about the meter is valid. The additional lens is going to cut down the light a bit. On that note, I wonder too if the effective aperture of the lens is changed by the addition of an aux lens. This, in combination with meter sensor and read-out inaccuracies might be why exposure was a bit of a struggle.
I agree, I greatly enjoy discussing others’ experiences with classic cameras; we’re all learning from one another about the funky gems of yesteryear!
LikeLike
I recently got hold of a Petri 7s which was advertised in ‘Good Condition’. I have not found major issues with the light meter and I find, with all film cameras, that they need plenty of light. Outdoor shooting works better than indoors.
I still do not get the clarity I would like but I am still trying and it could be more the user than the equipment.
LikeLike
It seems to me that they are not using the photometer correctly. According to the manual, the exposure must be done before attaching the auxiliary lens. The latter blocks the Selenium cell. It is not a TTL system. It is probably not the most comfortable option, but if there are not very changeable lighting conditions, the exposure should be adequate for the whole series of shots under those lighting conditions. At least it gives us a way to change focal points when the system does not allow it…
LikeLiked by 1 person
(From the manual)
HOW TO USE ‘AUX LENS’ FOR PETRI CAMERAS
1. Determine the shutter speed and aperture number previous to appllying the auxiliary lens. Thisexposure settings is used while the auxiliary lens is being used sith your Petri camera.
2. Screw the auxiiliary lens into the threaded barrel of the prime lens, and insert the auxiliary viewfinder into the accessory shoe located on top of the camera body.
3. Look through the viewfinder of the camera body and focus on the subject which you are going to photograph, by turning the distance scale of the camera.
4. Read the figure on the distance scale which is pointed by the arrow mark at the right from of the camera when the subject is correctly foccussed. (This is called actual distance…)
5. Take a reading of adjustment figure (to which actual distance corresponds) printed on the white aluminium belt around the Ausiliary Lens.
6. Set the above corresponding adjustment figure to black arrow mark on the distance scale of the camera body, by turning the distance scale.
7. Finally compose the picture within the bright line frame while looking throughthe auxiliary viewfinder. T mark seen in the viewfinderis used for picture border when Telephoto lens is used, and W mark for Wide Angle Lens.
LikeLike